In this article, you will learn how to set up a custom date reminder workflow trigger, and an example of what it can be used for.
- Select the “

- This will pull up a list of selections of triggers on the right-hand side of the screen
- Scroll down until you see the section called, “
- Select the “

- Find/Create the custom date field list within their profile
- Please Note:
To create a custom date field
- Click on the “
- Scroll down to the
- You will see a “+ Add Field” button

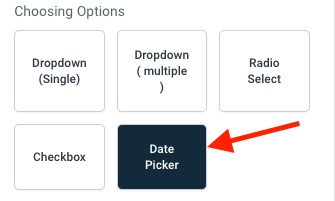
- A box will appear giving you the option to choose your Custom Field
- Under choosing options, select “
- Now click the blue “

- Make sure both the
- Once done click the green “

- Next, go back to the
- Click the blue “

- Now in the Standard Fields tab select the new “

- This will now give you the option to select the “Custom Date” filter

- Please Note:

- Click the green

- For Example:

- Press
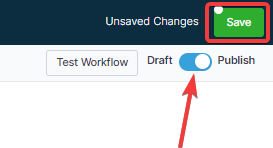
- If your Workflow is ready to be enabled, make sure the toggle switch under
- Be sure to test your Workflow to make sure it is set up correctly using the
- For an in-depth overview of Workflow Testing see our article, “Using the Testing Features in Workflows”
Now your workflow is set up and ready to go with the Custom Date Reminder Workflow Trigger.